Friday, December 26, 2014

Beginner's Guide to Flying a Quadcopter

So you got a quadcopter or other multirotor aircraft recently. Welcome to the hobby! Here's some notes about getting started, learning to fly, and what to watch out for.

This is not an all-inclusive list, and I highly recommend also reading / watching some other guides. Above all else, be safe and be mindful of where you fly. Don't fly over unwitting crowds or people, over other people's property without their permission, or any place that might pose a hazard to aircraft, automobiles, or people.

I highly recommend learning to fly with an inexpensive "nano" quadcopter such as the Blade Nano QX or the Hubsan X4 (Amazon).  If your first quad is a DJI Phantom 2 or something of similar size and weight, please consider buying an inexpensive nano quad like the ones mentioned here and learning on that first. There are a few reasons for this:
  1. You will crash. Crashing a $60 quad is a lot easier to deal with than crashing a $600+ quad.
  2. Small, lightweight nano quads survive lots of crashes. 330mm, 450mm, and larger quads almost never survive a crash without some damage.
  3. Small, lightweight nano quads don't hurt when they hit people, animals, or things. Larger quads can.
  4. Small, lightweight quads require you to learn flying and orientation skills that are necessary to fly larger quads. Larger quads are more stable and have more advanced features, which can dangerously mask your lack of skill until it's too late. By learning on the smaller, more agile, less advanced quads you are actually becoming a competent enough pilot to handle the larger ones. 
Don't be the guy flying the larger ones who doesn't have the competence to handle it.
{end rant}

Basics

(Mostly applies to inexpensive mini / micro quads, aerobatic quads, and non-DJI products):

Always power on the quad with it sitting still and level. All quads need a few seconds sitting level to calibrate the MEMS gyro / accelerometer each time they power on. If you apply throttle and the quad tries to go off in one direction violently: Land, unplug the power, plug it back in and let it sit level for 10 seconds again.

Keep the "trim" settings on your controller centered. If the quad "drifts", it's not because your trim is wrong. That's not how quads work. There's something else going on.

Speaking of hovering: "Level" flight and "stationary" flight are not the same thing. Most quads have an auto-level mode. This does not mean they will hover in a stationary point without assistance. In fact, almost no quad will do that. (Certainly no nano quads will.) When you see a quad hovering in place and not drifting in any direction, there's a pilot who's moving the controls fairly constantly to correct for drift. That is normal. It actually takes a fair amount of practice. (When you see a quad hovering in place, do a flip, and then continuing to hover in that same place, you're looking at a pilot who's had hours of practice doing that. cough, cough.)

LiPo batteries:


Once you get a feel for how long the battery lasts, try and stop flying at about 80% drain instead of 100% (e.g. when the copter gets weak instead of when it just won't fly anymore.) This will more than double the lifetime of your batteries.

If you can, resist the temptation to immediately put the battery on the charger after you've drained it. (That also shortens the life of the battery.) Let it "rest" for a while before charging it again. 15 minutes is probably long enough for those little 1S batteries. 30-60m is more appropriate when you move up to larger quads with 3S & 4S batteries.

Yes, given the above two points you'll definitely want some more batteries.

Here's a good LiPo battery guide, if you're interested in knowing more about them.

Throttle & Orientation

The hardest skill to master when learning to fly a quadcopter is maintaining orientation. The second hardest skill is controlling throttle while you're also controlling other maneuvers. (This is why early on you always either suddenly hit the ceiling or the floor when you're surprised.)

Fly it "tail in" (tail facing towards you) for a while until you get comfortable with maintaining a stable altitude throughout. Tail in is the easiest way to fly, because you and the quad are facing the same direction. In this orientation, the controls are natural feeling. For a while, it will feel like that's the only way you can fly, and if the quad gets yawed (rotated around the Z axis) more than 50° to either side you'll quickly lose control. Patience!

Once you've mastered "tail in" flying and start to get bored with it, it's time to learn to fly at different orientations! (I don't recommend trying this before you have some experience and don't have to think about the throttle controls anymore. Stick to "tail in" flying until you're comfortable.)

Here's what worked for me when learning orientation:

Left / Right Passes:

Start with the quad in front of you and facing to your left. (Its left side is towards you.) Take off. Practice hovering. Remember that LEFT is towards you and RIGHT is away from you. Make a 180 turn by yawing to the right. Now it's facing right and the RIGHT side is towards you. Practice hovering like that. Repeat until you can make the turns and then maintain control without having to think about it so much.

Once you get that down, do the same thing but have the quad move forward before the 180° turn. Fly it by you with the LEFT side towards you, have it turn 180°, then fly it back by you with the RIGHT side towards you, turn 180°, &etc.

Boxes

Once those maneuvers seem easy, add a straight out leg and straight in leg to each side so you're actually flying a large square in front of you (with the quad always flying forward.) Remember that on the "inbound" leg the quad is facing you so left and right will seem reversed. The same is true for the Left/Right passes though, so you should already start to have a feel for that.

Figure Eights

Now, try flying a figure eight in front of you. (With the quad flying forward throughout the maneuver.) If you can do it, congratulations. You have a solid handle on flying in all orientations.

Completing all of the above comfortably took me months. Feel free not to tackle any of it for a while. ;)

Outdoor flying

It's inevitable. You've been flying indoors a while, and you're tired of hitting walls and ceilings. So you think "It's nice out, let's go OUTSIDE!"  DANGER WILL ROBINSON.

These things are incredibly small, incredibly fast, and there is no documented service ceiling. They're often capable of flying higher than you can see them at!

You will lose control of the quadcopter.  How you fly and how you react when things go wrong are the difference between having to repair the quad or having to spend two hours in vein looking for it, giving up, and then sheepishly buying a new one.  I have lost three quadcopters so far.  Lost ... as in, they flew away and I never found them again.  It's easier to do than you think.  Here's some advice to try and prevent that.

  • Get low.  Don't fly above rooftops, treetops, or other nearby obstacles. (Certainly not if you haven't mastered ALL of the orientation lessons above.) A funny thing happens five feet above the immediate obstacle line: WIND. There's probably a steady breeze 20 feet up that doesn't exist at ground level. A steady breeze can carry your nano quad away faster than you can bring it back to you. The turbulence between the ground level and that steady breeze can also cause your quad to make unexpected turns, which can throw off your orientation.
  • Be willing to DROP.  At some point you will find yourself higher and/or farther away than you intended. Your instincts will be to add throttle and fly it back. BE WILLING TO ABORT and just cut throttle and let it crash. It's better to have to repair a quad than to not know where it ended up.

Flyaway Recovery

This is by far one of the hardest skills in outdoor quadcopter flying, so it's going to get the longest treatment. I don't think this applies as much to other R/C aircraft, because most R/C aircraft won't keep flying if you become disoriented to begin with. They just crash. But many quads will obediently keep themselves level and in the air even if you and the quad are on completely different pages about which way it's facing and/or moving... and this is how quads get lost.

In my (contentious) opinion you should master flyaway recovery with nano quads before you ever fly anything larger. Dropping a nano quad over the visible horizon is annoying, and possibly a slightly expensive ($100) lesson. Dropping a 4+ pound quadcopter with a 3S lipo battery over the visible horizon could cause serious injury or property damage. Better to learn the safe and cheap(er) way!

The set-up is this:

You're flying outdoors, a little higher than you're used to, maybe doing some fast maneuvers or trying something new, when suddenly you realize the quad is doing something other than you expect. It takes a few seconds to register this discord in your head and by the time you do the quad is a hard to see speck over the top of your neighboring horizon / obstacles. E.g.: It's either over and beyond a nearby treeline or rooftop. You're scared to cut throttle, because you don't actually know where it will come down. To not lose sight, you've had to add power, so it's now higher up (and further away). What do you do?!?!

This is a terrifying situation. Here's the reality:  Without experience, you are about to lose your quad and there's probably nothing you can do about it.  If it were a larger, advanced aircraft this is where many hit the "Return To Home" switch and pray. (Whether that's the Right Thing To Do™ is a subject for another day.) If it's a nano quad you really only have two options: A: Try and regain orientation at the risk of it going even further away, or B: Just give up, cut the throttle, and go searching for it.

Everyone tries option A first. Sometimes for too long. Two of my three aforementioned lost quads were this exact situation. I fought and fought to get it back and eventually watched in vein as it disappeared and was just.... gone. (The third was actually an equipment malfunction that I couldn't do anything about.)

When this happens to you (cough, cough) my one remaining piece of advice is this: DON'T TURN OFF THE TRANSMITTER. Pull the throttle to idle, run to wherever you think it may have came down. Stand still for a second, take in the surroundings, then "goose" the throttle a few times and listen. You may be able to hear it whining and trying to spin up the motors. This may be how you locate it. If not, well, how long you spend looking (and to what extent) is between you and your deity of choice. Good luck. :-P One hint, though, NANO QUADS are never as far away as they look. In fact, it's probably only half the distance away that you think it is, so start there.

Lost Orientation Recovery During a Flyaway

Let's go back to the point just before you lost it. You can see it, it's a speck on the horizon, and you don't know which way its facing.

Here's what you do:

Regardless of orientation:
  • Calm down. You're going to panic. Try not to "panic fly" though. 
  • Avoid any YAW inputs. (It will only make things worse) 
  • Avoid abrupt control inputs. You can lose control easily. 
  • Avoid full deflection of the controls. (Don't push any sticks all the way to the edge!) 
  • Turn on auto-level (if it's not on already.) 
IF you think the quad is facing TOWARD or AWAY from you:
  • Very gingerly try "LEFT ROLL" first. Try moving it left for a second or two. 
    • If it moves LEFT: Center the stick, pitch it back gingerly and hold it and just patiently wait. 
    • If it moves RIGHT: okay, it's actually facing you. pitch it forward gingerly and hold it, and just patiently wait. 
IF you think the quad is facing LEFT or RIGHT respective to you:
  • Very gingerly try to PITCH FORWARD first, for a second or two. 
    • If it moves LEFT: It's facing left. Center the stick, roll it left gingerly, hold it, and just patiently wait. 
    • If it moves RIGHT: It's facing right. Center the stick, roll it right gingerly, hold it, and just patiently wait. 
If you don't know which way it is facing (or the above maneuvers don't result it it moving left or right respective to you):

This is the most dangerous situation, because your attempt to determine orientation might actually send it out of sight. The good (?) news is, there's only a 1:4 chance that a direction you pick will be directly away from you. So ask yourself, do you feel lucky, punk?

Pick one of the above and try it. If you've already tried LEFT, then try FORWARD (or vice versa). I like to try "LEFT ROLL" first but that's just me. The main point is be deliberate and methodical in your attempts, don't just haphazardly try things. Try LEFT ROLL for a couple of seconds and if it doesn't move LEFT or RIGHT clearly, then counter with the same amount of RIGHT ROLL for just a second to freeze it and then move on to trying PITCH FORWARD instead. If you're slow and deliberate you, with practice, will be able to determine which side is facing you.

In all of the above situations:

Once you figure out which side is towards you:

  • Go ahead and bring it directly towards you by pitching / rolling it towards you. Do not attempt to "turn" or yaw it back into a more comfortable orientation. You might under/overshoot the turn and then you'll have to start all over again.
  • Be patient. You're panicked, your heart is racing, and "time dilation" is in full effect. Resist the temptation to yank the controls, and be willing to trust that the quad is coming towards you based on a small (25%?) control input even though you won't be able to tell for the first several seconds. If you direct it towards you and nothing seems to happen, then IT'S PROBABLY WORKING. Just hold it and count to five and you should suddenly see that it's getting bigger as it comes home. This is the most satisfying feeling in the world, btw.
  • Once you get it back: Land, sit down, breathe. You're more panicked than you realize. Losing control of a flying thing and then regaining it is a lot more mentally taxing than you imagine, and you probably need a minute to collect yourself. 
Read all of the above and visualize having to do it a few times, and you might just pull it off the first time it happens to you! ;)

Happy flying!

Tuesday, November 18, 2014

Grand Canyon flight / Magneto Failure

So last week my wife and I left the kids with the grandparents and headed for the hills in my '67 Skyhawk for my 40th birthday.  Our plan was to fly from Palo Alto to the Grand Canyon by way of Las Vegas.

Day 1
Flight One: Palo Alto (KPAO) -> Shafter / Minter (KMIT) Mohave (KMHV)


Route on Skyvector.com

Departed as planned, but the haze in the south central valley was terrible. Bakersfield reported "Skies clear, visibility 2 1/2 miles" (That's not haze, it's fog!) So, I amended my destination and went over the hill to Mojave (KMHV) instead. While having lunch I double checked the rest of the route and decided since we were already in the Mohave desert to go ahead and continue via the Trona, CA corridor instead of going South to Palmdale.

Flight Two: Mohave,CA (KMHV) to Henderson, NV (KHND) via Trona Corridor

Route on Skyvector.com

I've done this route a few times now. This was the first time into HND that LAS approach refused to clear me into the Class B when coming east through the Columbia Pass... which means I had to descend under the shelf, continue east until I was due S of HND and then descend to within about 1000' of those hills to fly towards HND. No big deal (it was a very clear day) just not what I was expecting.


Day 3: KHND to KGCN (Grand Canyon Airport)

Route on Skyvector.com


- Flawless. Got radar service from HND and LAS on the way out, and was handed to LA Center for the rest of the flight. I had planned the flight to go over the Hoover Dam and BLD VOR, but Vegas Approach wanted us further south than that for arriving traffic. No big deal.

LA Center confirmed that I was familiar with the Grand Canyon special VFR rules (I was) and had no further questions after that. Winds were 20G30 on the ground, so it's probably good that the special VFR rules kept us 3K+ above it anyway. At 11,500 it was smooth.

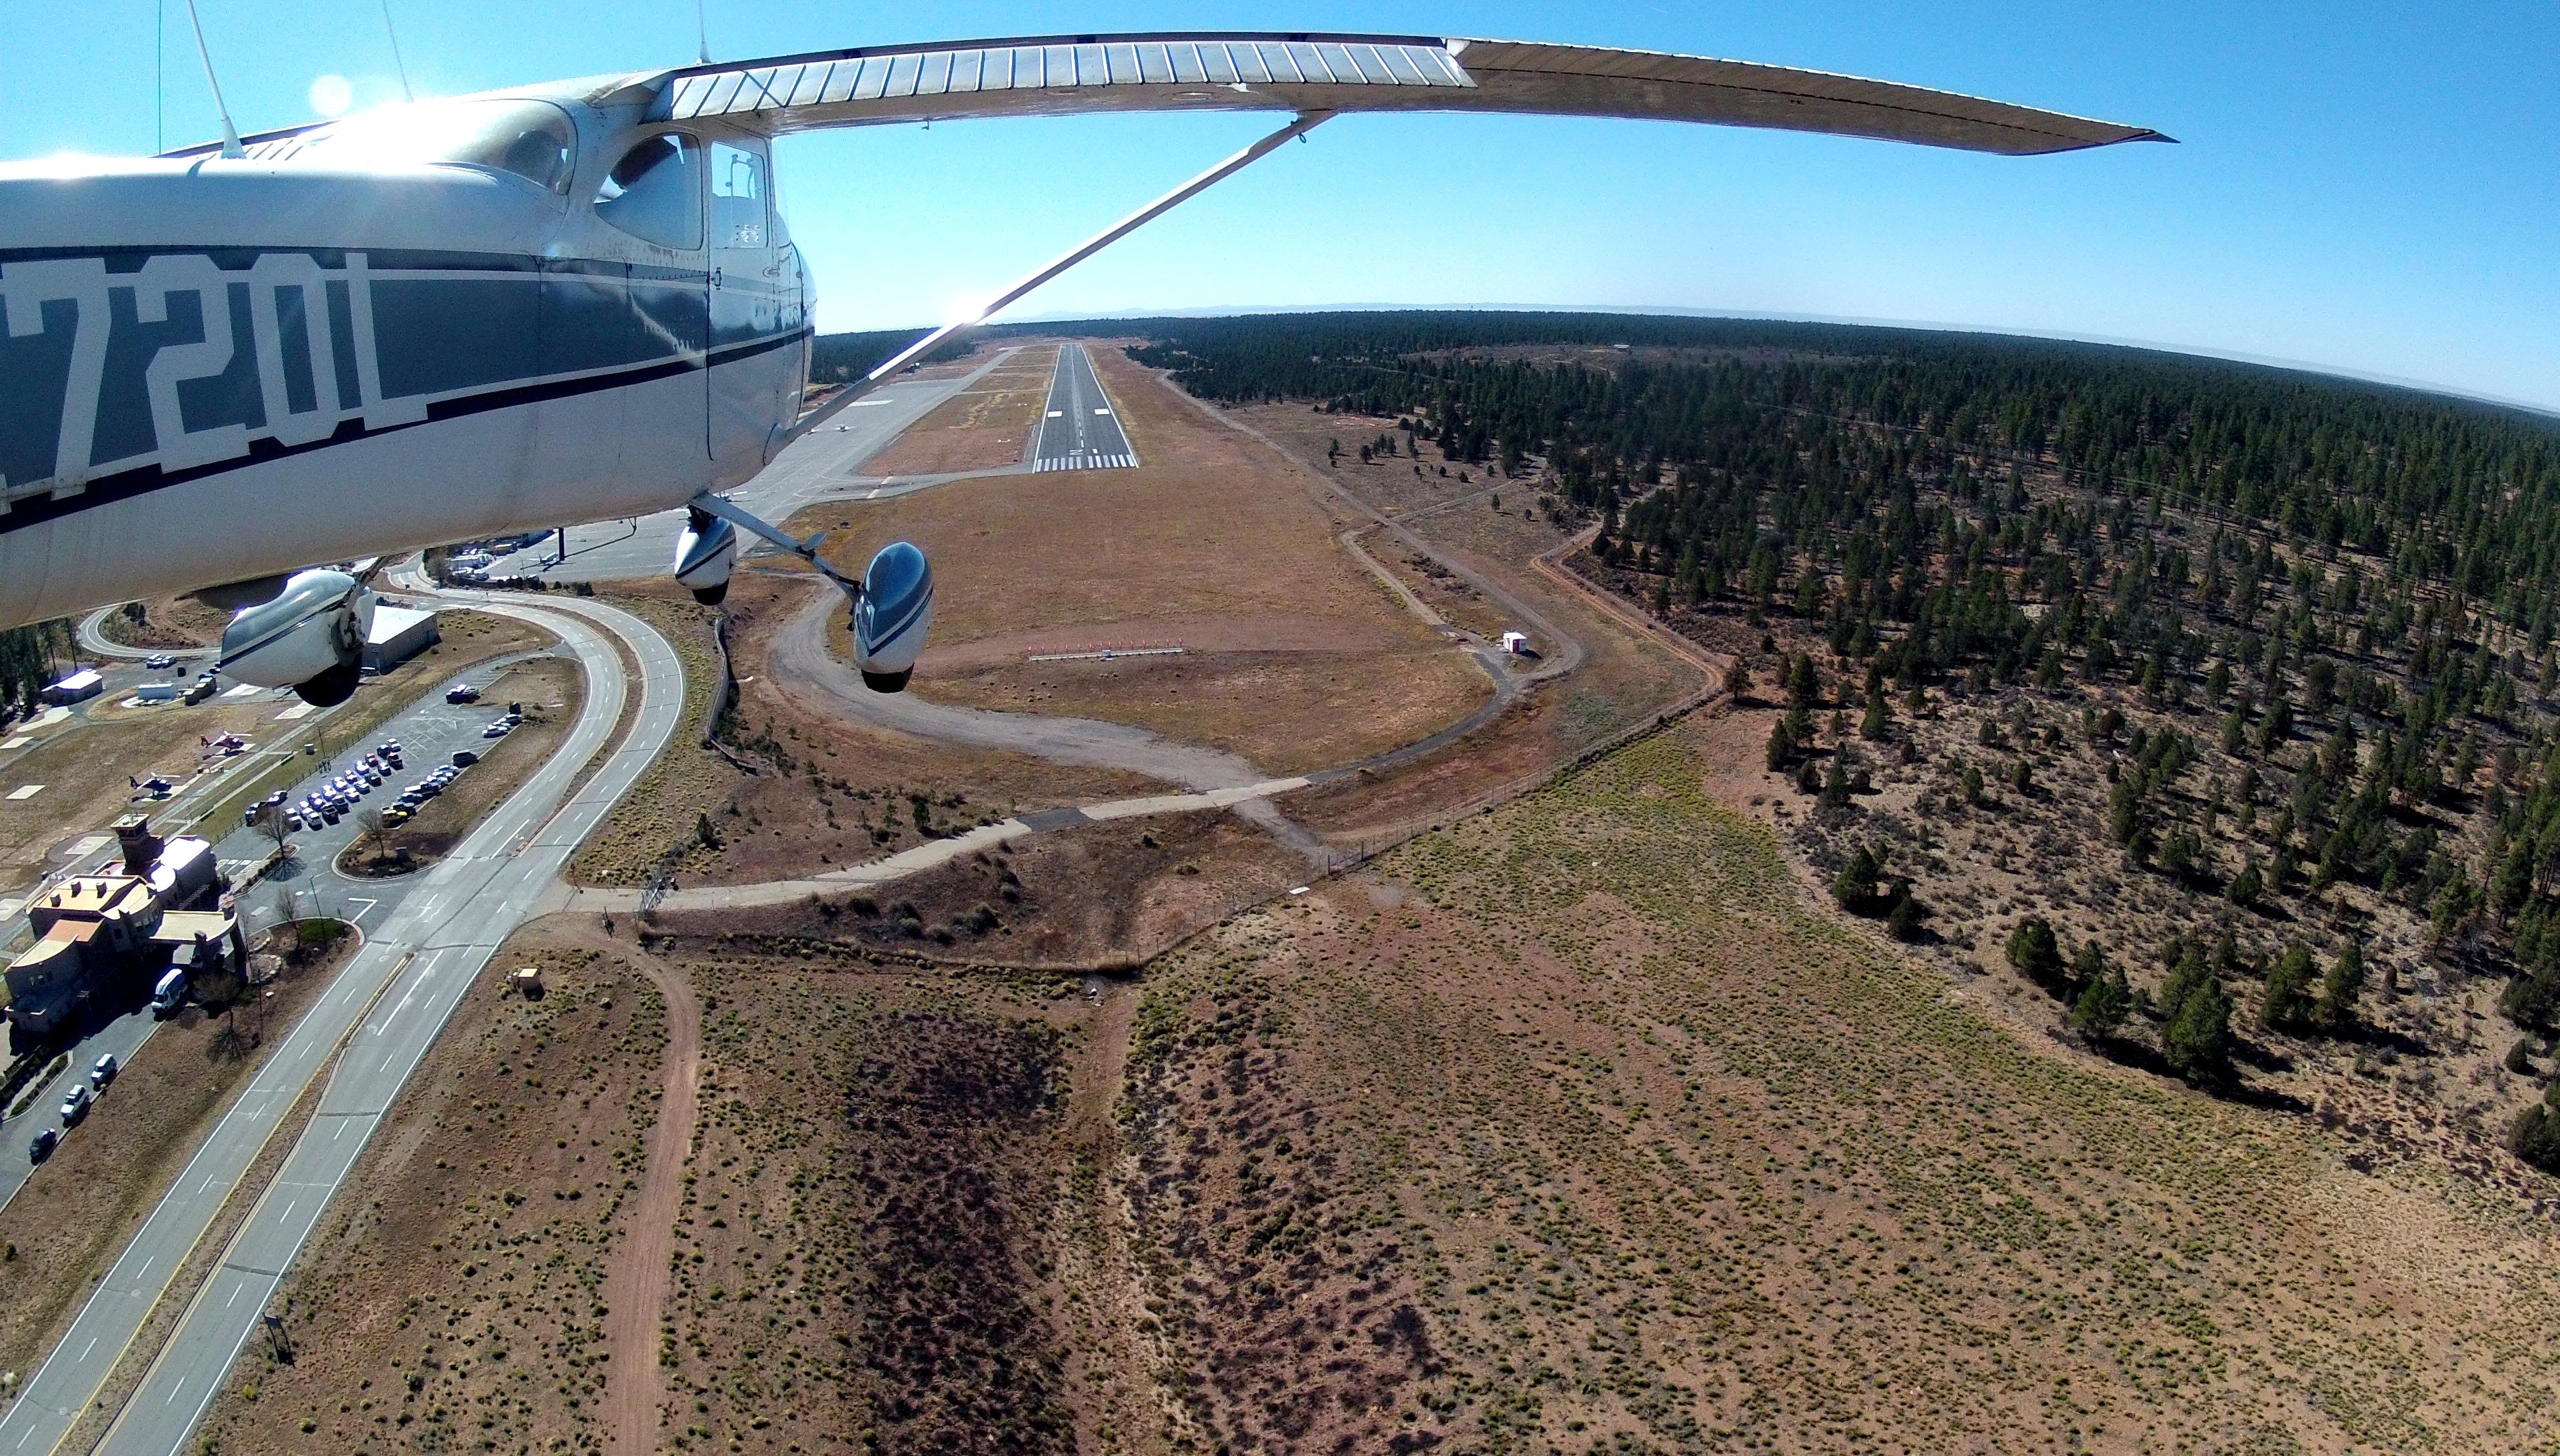
GCN: You're advised to remain with your aircraft upon landing until the FBO comes to get you, since there's a TSA area between the ramp and the FBO. Yay for security theater. (Taxiing my aircraft around is safe, but walking isn't!) Other than that oddity, and the $7.20/gal avgas, it's just like any other GA airport.


Day 4: KGCN -> "Dragon Corridor" (N) -> "Fossil Canyon Corridor" (S) -> KHND

Route on Skyvector.com


Scenic flight over the canyon tour corridors before departing west. We donned our O₂ cannulas again and took off into the same 20+ knot winds we landed in yesterday. GCN tower was very friendly and continued to provide traffic alerts as we did circling climbs south of the Supai sector to get to the required 11,500 feet for flying the corridors to the North. It was turbulent near the ground but smoothed out nicely once we were over 2k AGL.
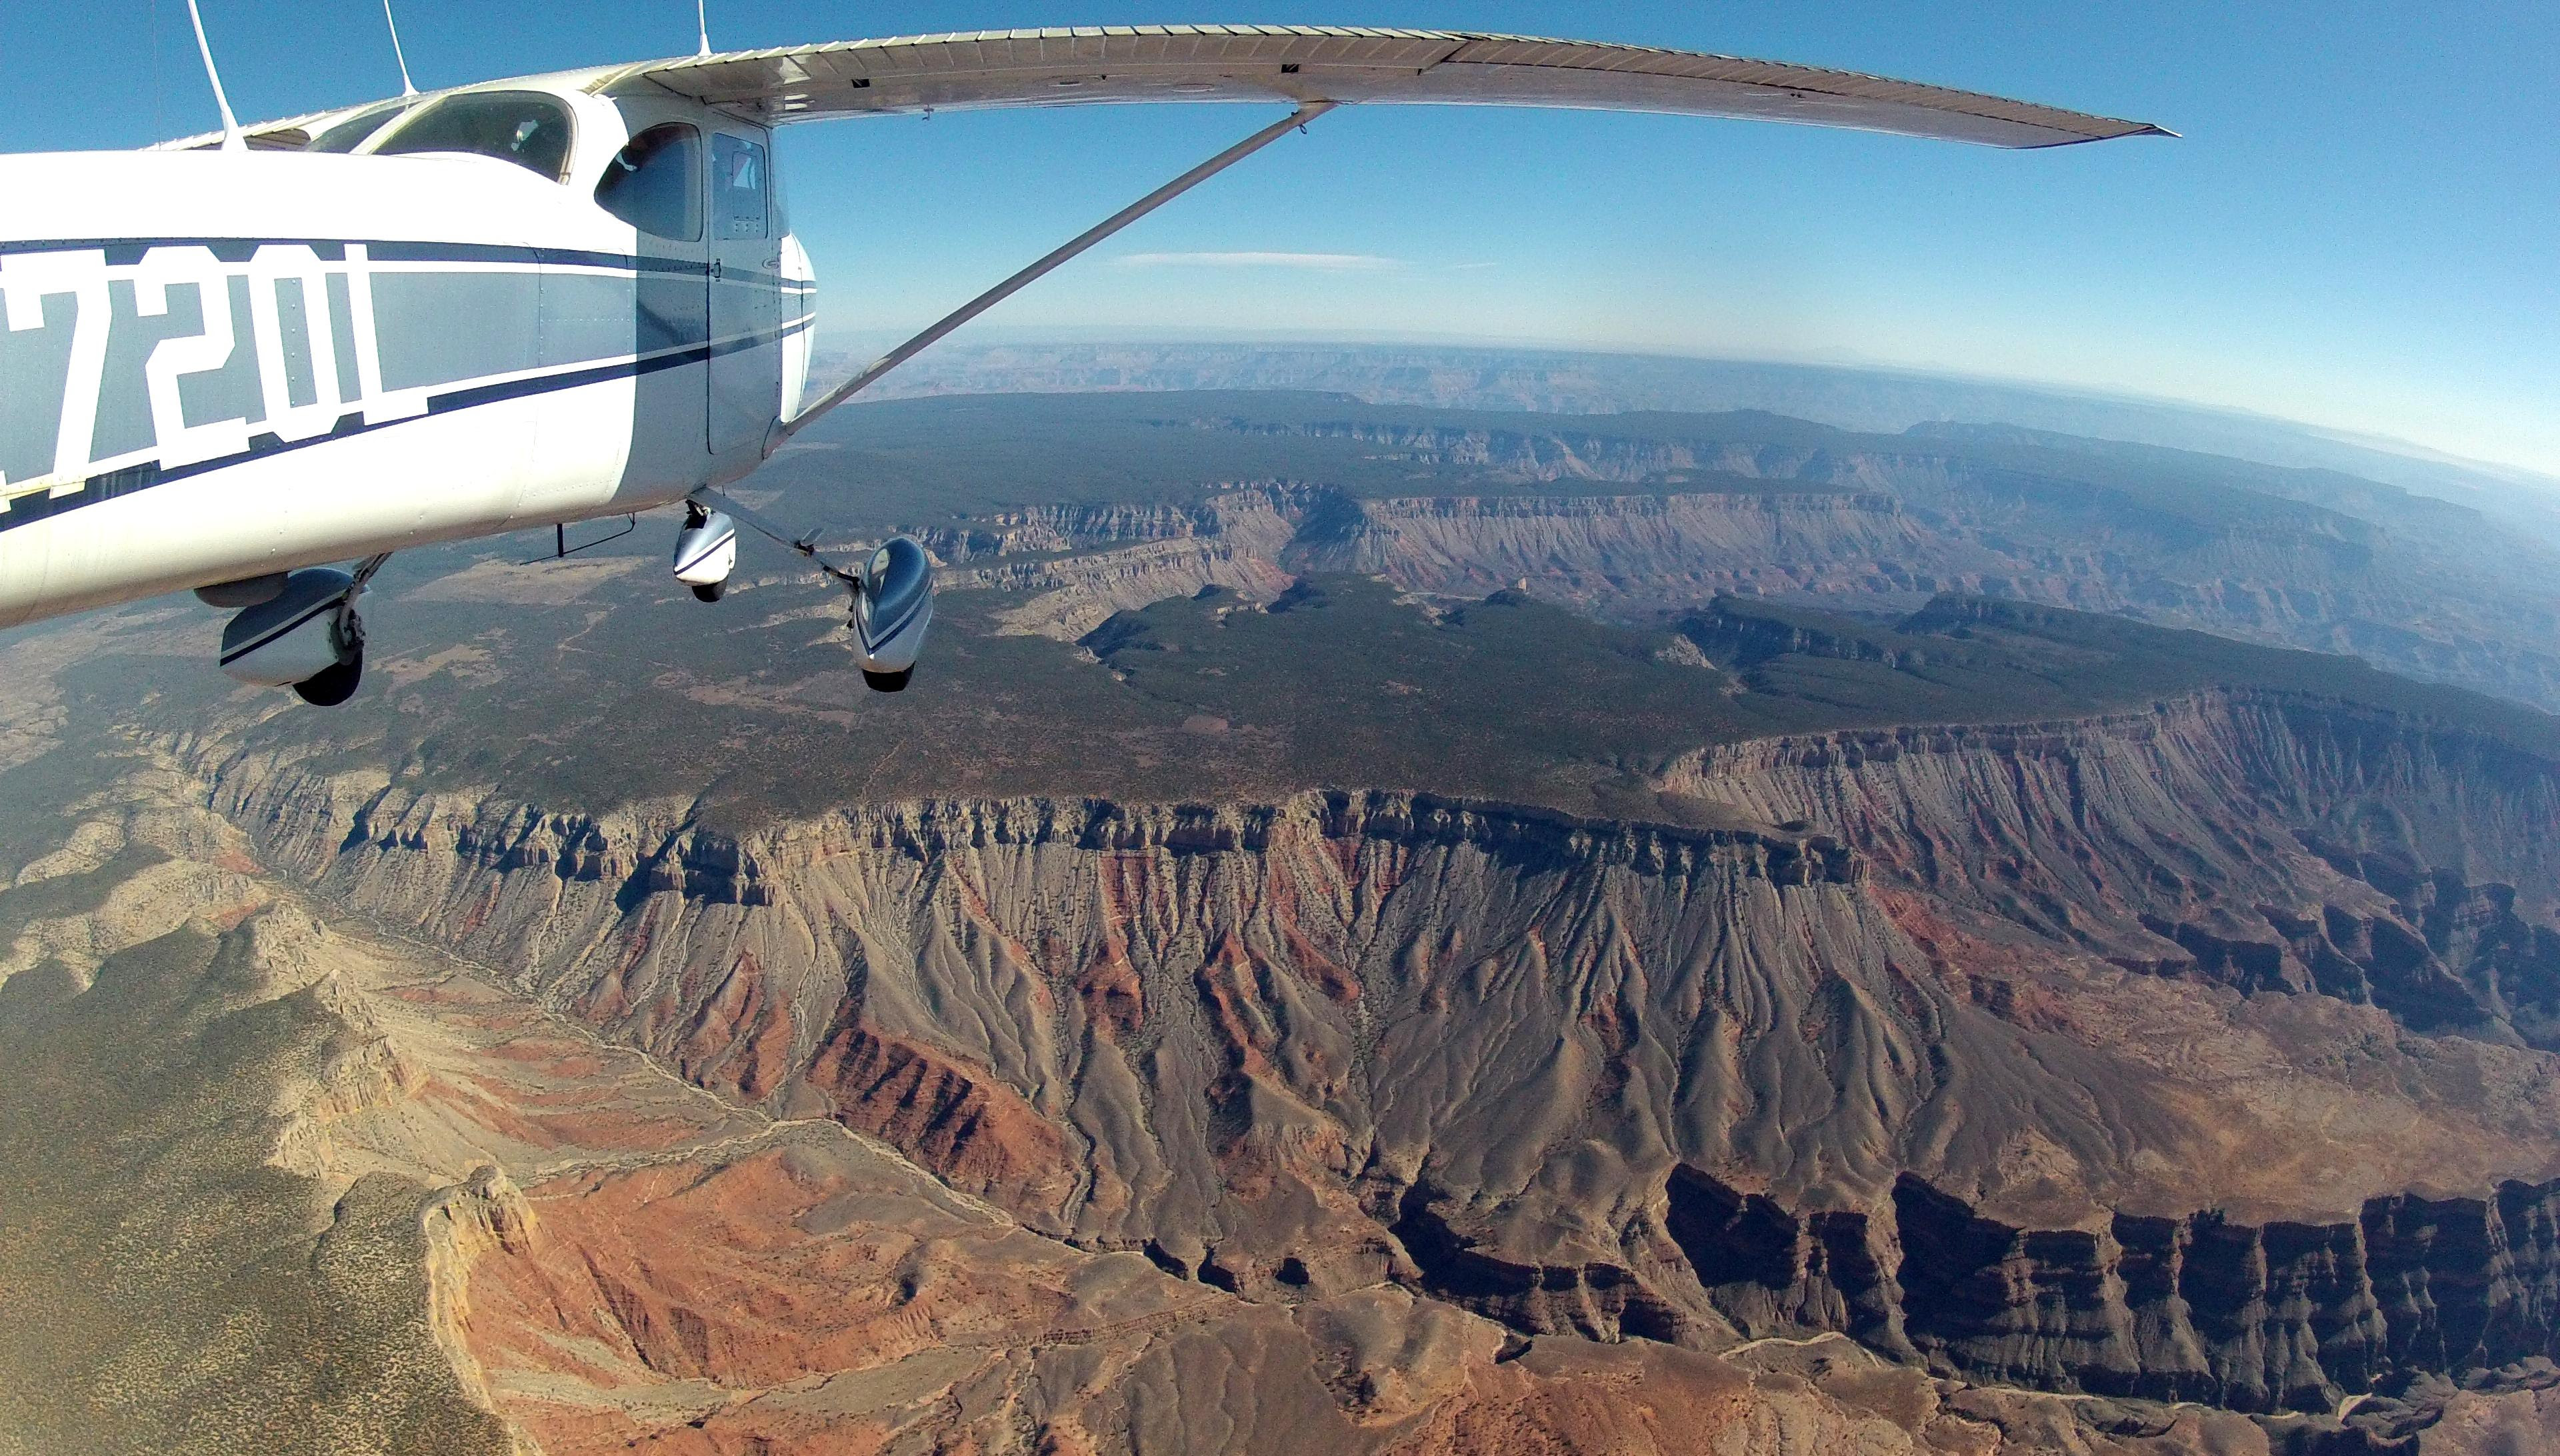
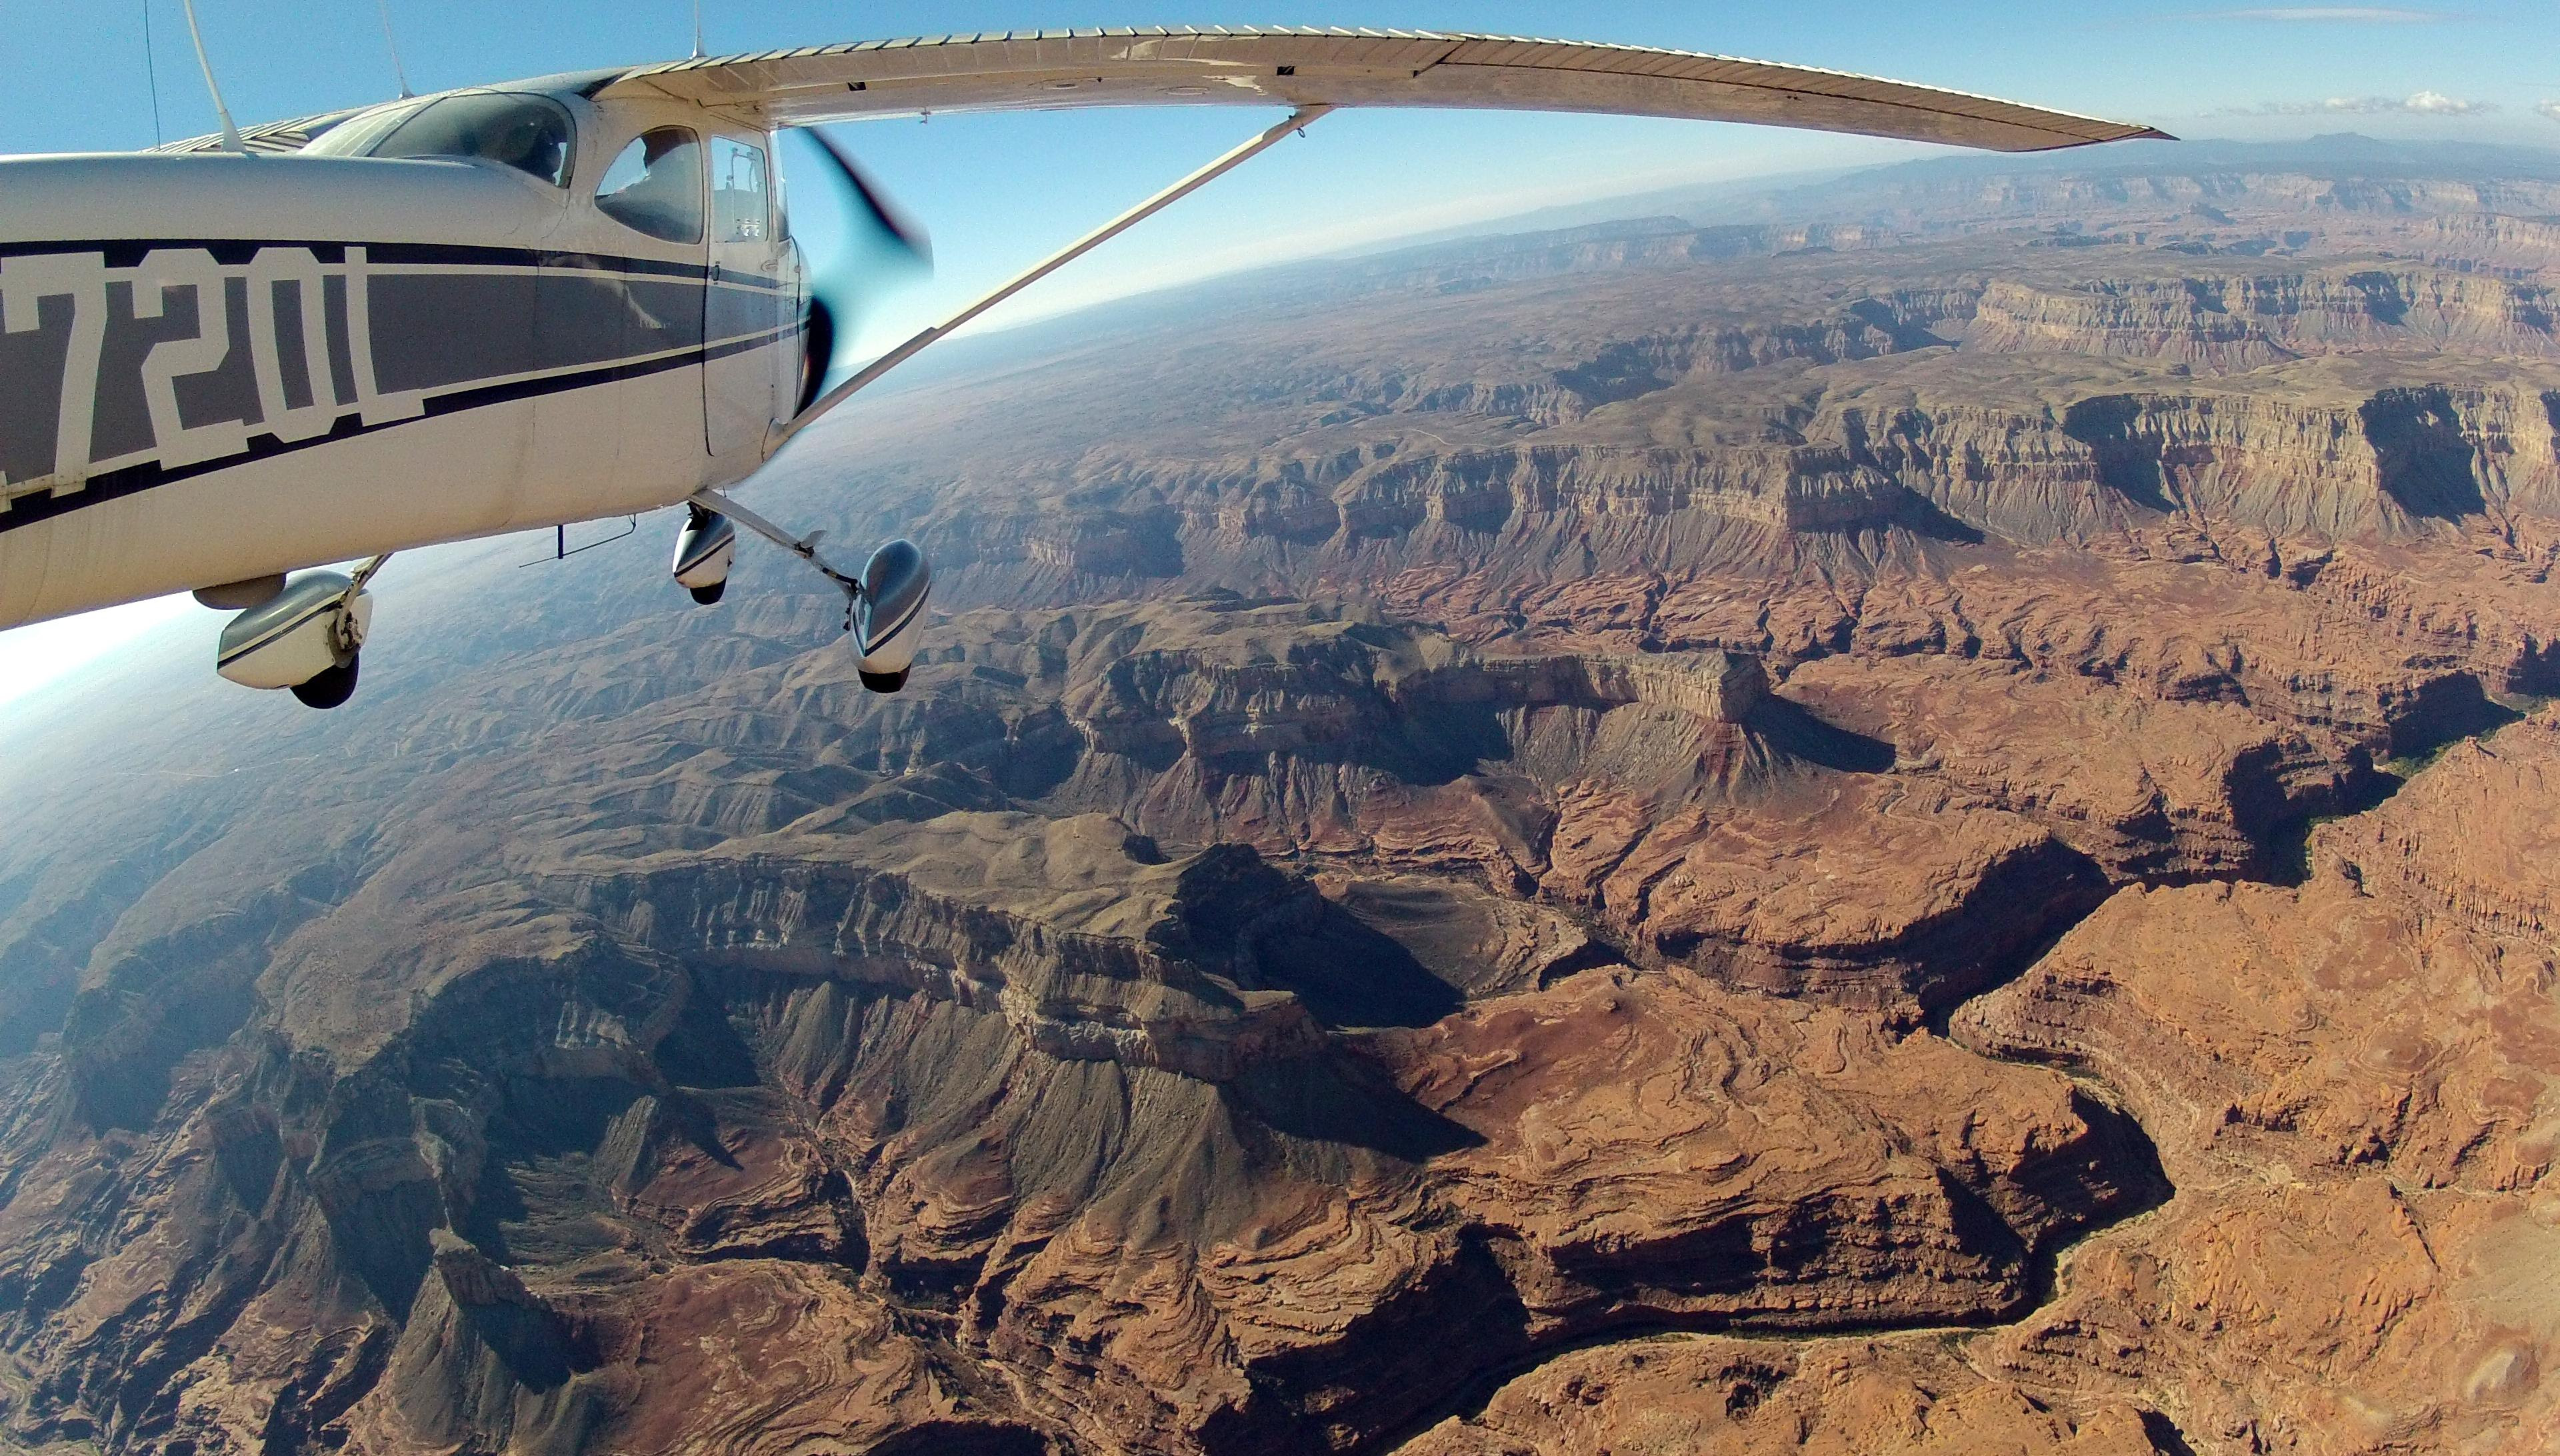
Man, that is a big canyon! We continued north past the Dragon Corridor to the edge of Marble Canyon before turning back west and south. There was snow on the ground in the shadows north of the canyon. Monitoring the tour operator frequencies made us aware of the constant stream of helicopters criss-crossing the canyon beneath us. It's hard to imagine how they manage those beasts over those ridge lines at 8500 MSL in gusty 20-30kt winds, but they didn't seem fazed by it.

We picked up LA Center again south of the Fossil Canyon Corridor and flew back to Henderson without issue.


Day 5: KHND -> KMHV -> KPAO (Returning home)

Departed back the way we came, across Death Valley and through the Trona corridor. Stopped in Mojave for lunch and gas, only to discover upon my pre-flight check that my left magneto was no longer functioning at all. (It worked fine prior to departing Henderson.)

Returned to ramp, aborted flight, arranged a rental car from the neighboring Ford dealership. :(

Thankfully, Kenneth Hetge in Tehachapi, CA was available to do a field repair. It turns out both mags were due for an overhaul. The coil on the left one had cracked and finally died. Aero Services in Van Nuys overhauled both, replaced the coils, and Ken reinstalled them on the aircraft. Two days and two AMUs later I returned to Mojave with the rental car to retrieve my aircraft without further incident.


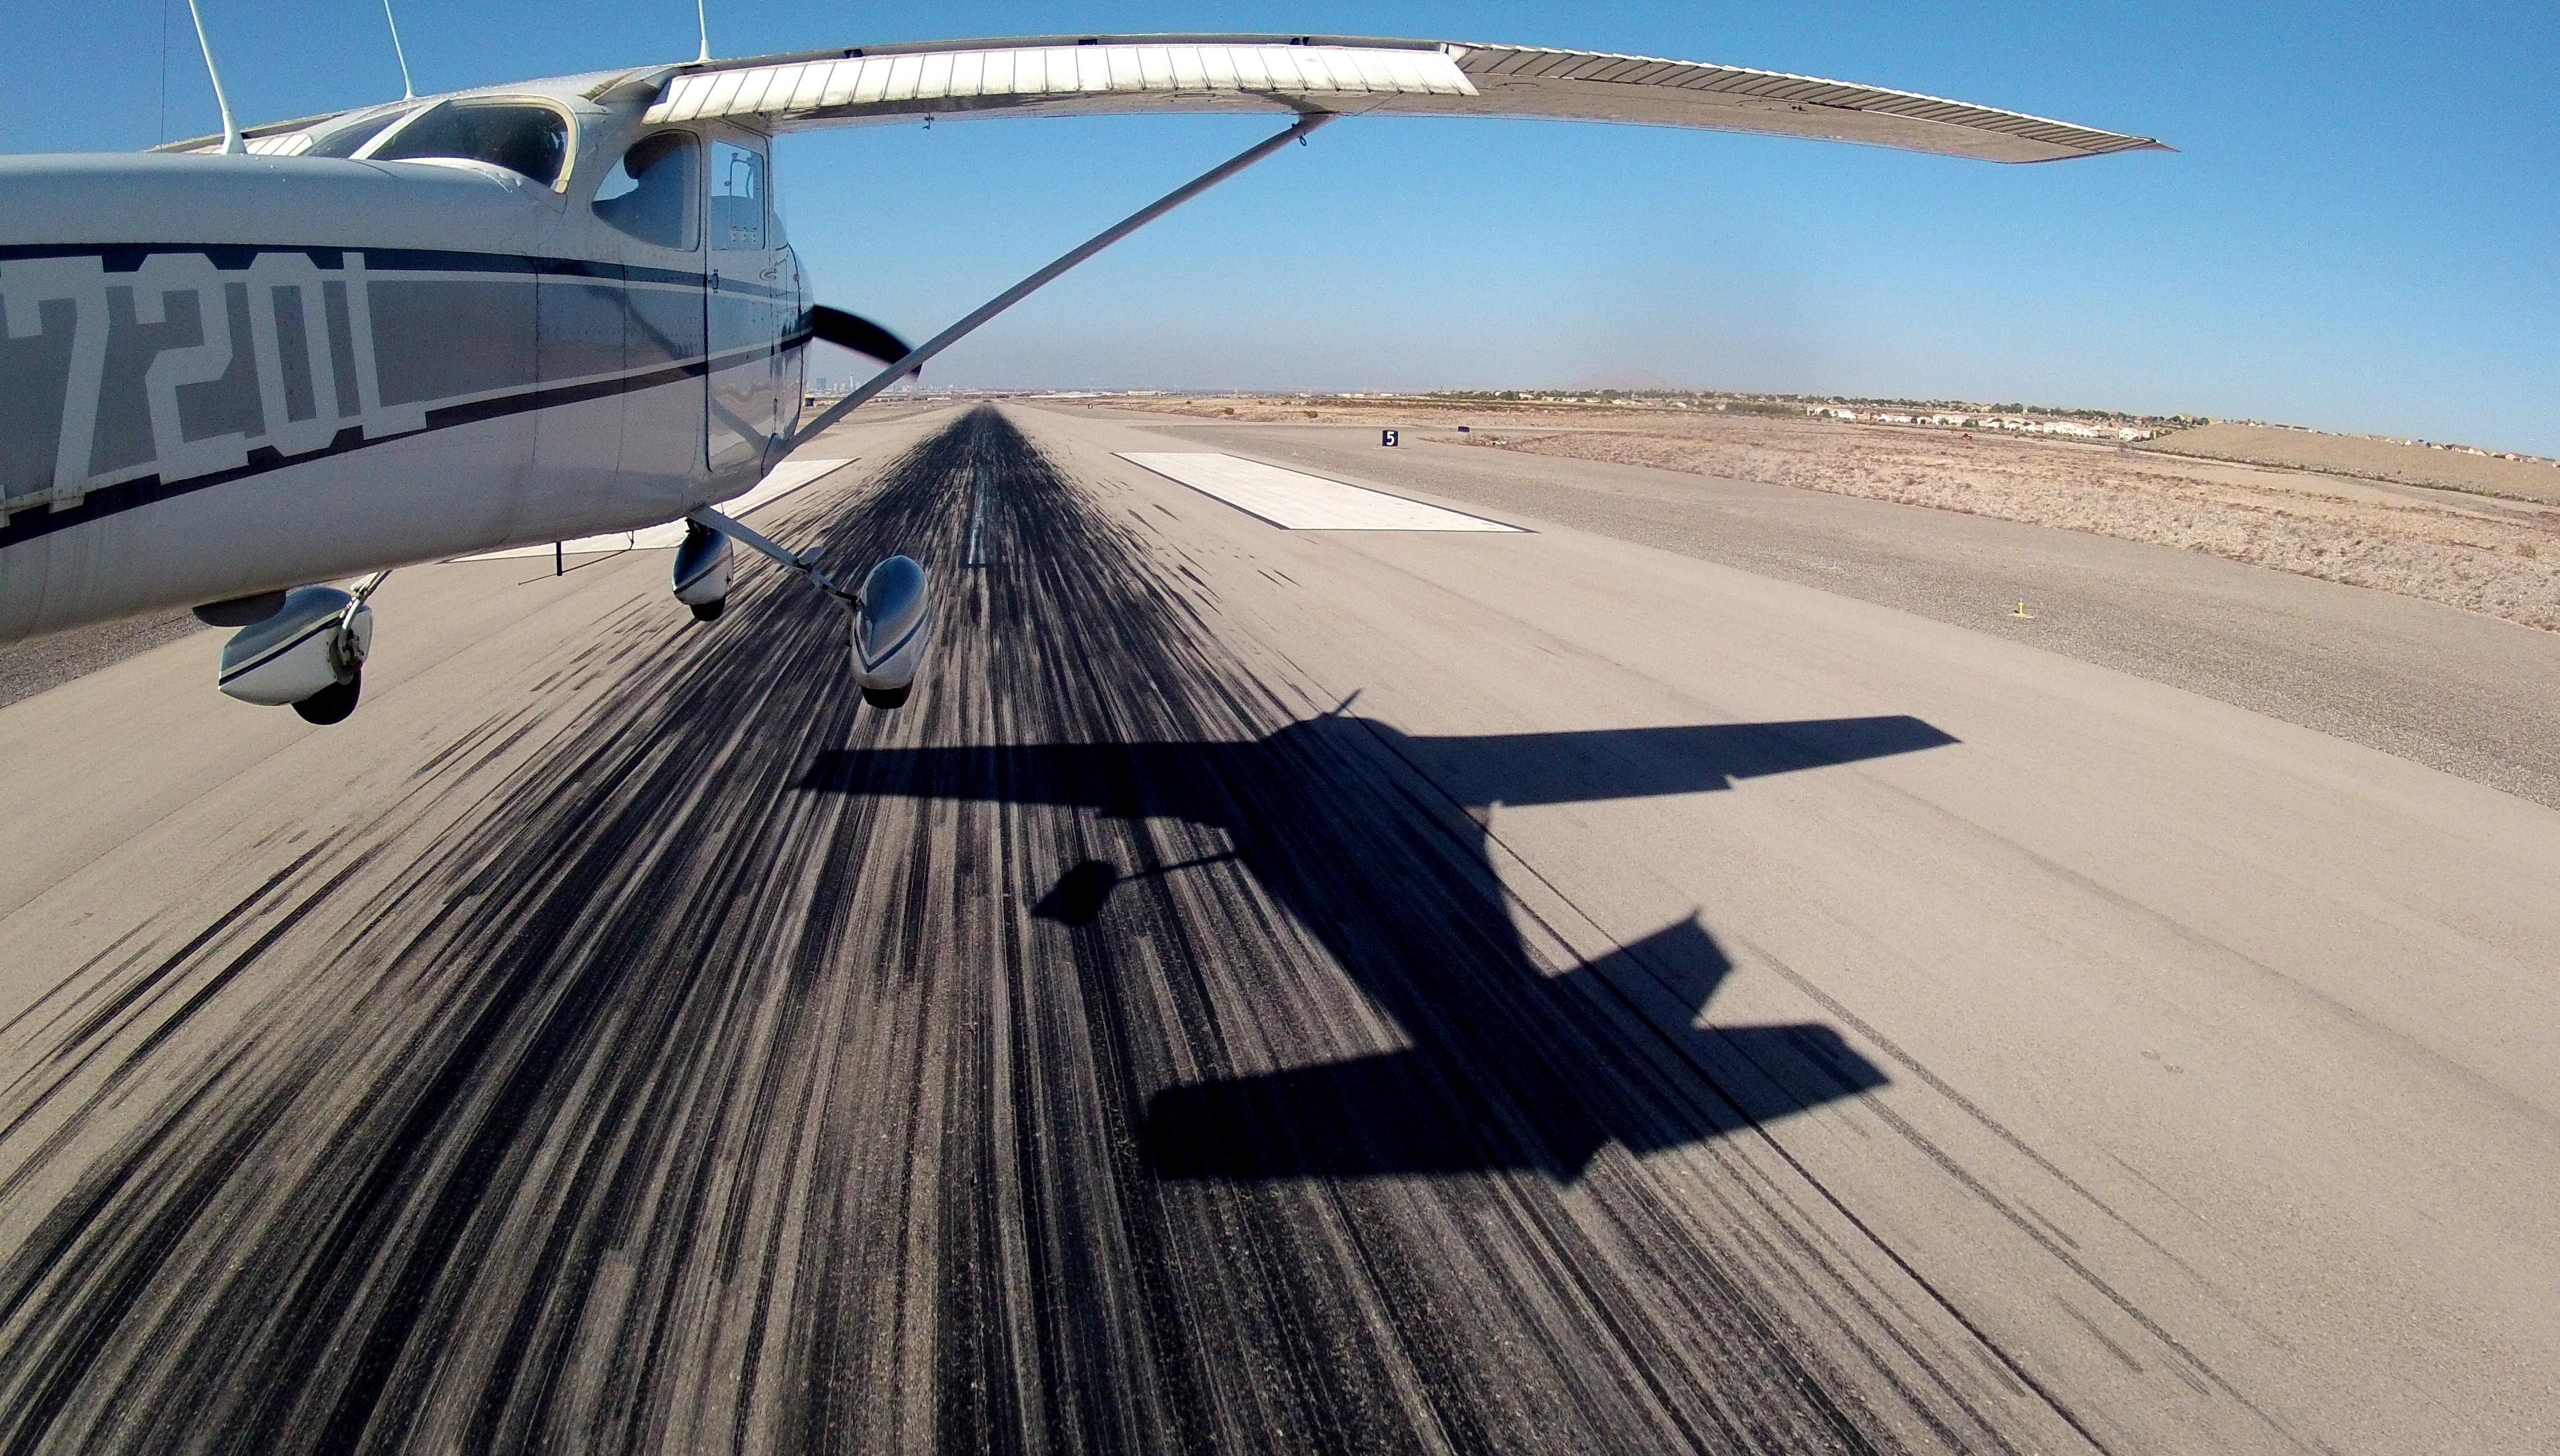
Some other airplane GoPro shots

Tuesday, June 24, 2014

FPV Flying, The FAA, and the rules.


This morning my inbox exploded with articles about the FAA's recent Interpretation of the rules for R/C flying. Specifically with their consideration for "First Person View" (FPV) flying. (Flying by reference to a video transmitter on board the model aircraft.)

http://motherboard.vice.com/read/the-faa-is-trying-to-ban-first-person-view-drone-flights


http://www.faa.gov/news/press_releases/news_story.cfm?newsId=16474&cid=TW223


http://www.faa.gov/about/initiatives/uas/media/model_aircraft_spec_rule.pdf

Summary: According to the FAA, FPV flying in the US is not legal, even with a spotter.

Details:  [14 CFR Part 91 , Docket No. FAA-2014-0396, "Interpretation of the Special Rule for Model Aircraft"]:
Under the criteria above, visual line of sight would mean that the operator has an unobstructed view of the model aircraft. To ensure that the operator has the best view of the aircraft, the statutory requirement would preclude the use of vision-enhancing devices, such as binoculars, night vision goggles, powered vision magnifying devices, and goggles designed to provide a “first-person view” from the model.
Such devices would limit the operator’s field of view thereby reducing his or her ability to see-and-avoid other aircraft in the area. Additionally, some of these devices could dramatically increase the distance at which an operator could see the aircraft, rendering the statutory visual-line-of-sight requirements meaningless. Finally, based on the plain language of the statute, which says that aircraft must be “flown within the visual line of sight of the person operating the aircraft,” an operator could not rely on another person to satisfy the visual line of sight requirement. [...] While the statute would not preclude using an observer to augment the safety of the operation, the operator must be able to view the aircraft at all times.

My reaction:
On the surface, that seems rational. Where it falls apart is that FPV flying doesn't necessarily have to be done in locations or at altitude where such oversight makes any sense at all. I am 100% on board with the idea of preventing people from operating R/C aircraft without LOS at high altitudes in places where I might be in my Cessna. 

But does that mean it should be illegal to wear FPV goggles and fly around a field, away from any airports, at < 200 feet elevation? If my Cessna is ever there, it's because I'm doing an emergency landing. Randomly encountering an R/C aircraft (or bird, or baseball) is fine with me.

Does that mean it should be illegal to fly aircraft using FPV equipment under tree canopies (where there can't possibly be other aircraft?)

The FAA rule is draconian. FPV flying is becoming not just a hobby, but a sport. And by passing draconian rules like this the FAA is taking rational conversation off the table and ensuring that thousands of people will just disregard them and break the rules.

And that puts me at greater risk. Thanks a lot.   

FAA , if you are listening - let's have a conversation about this.  Blanket restrictions on very popular, widespread, and largely safe activities are not a good idea.  Let's discuss where FPV flying does and doesn't make sense.  Let's discuss where interference with aviation operations may and may not happen.  And let's discuss how to properly educate the FAA, pilot, and R/C communities about each other's activities, so we can coexist in a safe and harmonious way.  

Today it's a battleground, and each side is largely misrepresented by misinformation to the others.  This isn't the way forward.

Monday, June 16, 2014

Donkey Quad


Update:  Have one?  Building one?   Click Here: Donkey Quad Manual

A while ago I bought an inexpensive HobbyKing F330 frame, thinking I would use it with some SunnySky X2212-9 1400KV motors and 8" props I had.  Unfortunately, that turned out to be a very unstable combination.  It was fast as hell, and good at aerobatics, but I couldn't tune the shakes out of it.  I decided those motors were just too big for that small 330mm frame.

On a whim, I was looking at the cheapest 3S capable outrunners that HobbyKing sells when I ran across these ugly duckings here:

The Donkey ST2004-1550kv, "When pulling power matters and looks.. well.. just don't."

HobbyKing Donkey ST2004-1550kv
The mounts are nonstandard ugly aluminum tangs with holes in them.  The sticker oddly says "ST2204-1550kv" whereas the website part number os "ST2004-1550kv".  They have 3mm shafts, but don't include any collets or prop adapters.

But, they're dirt cheap, they work as advertised, and they're seemingly a lot more crash resistant than the similar-rated Park300 1400kv motors I used to use on a similar sized quad.

I had to use 4" zip-ties to attach them to the F330 frame.  I did it by threading the tie down through one hole, under the frame, up through the opposing tang, and then putting a cut off zip-tie "head" on the other end.  Repeat for the other set of tangs and you have a solid mount with no screws.  ;)
Mounted w/zip ties

Paired with some disused Afro 12A ESCs, a MultiWii MicroWii FC, OrangeRX R100 receiver, and some 7x4.5 props and I have a small, super light, fairly agile quad.  It's not the fastest one I own, but it's light and agile enough to do in-place flips or double-descending-rolls.

It turns out to be a joy to fly, and I've been spending more time with it than my more expensive quads.

Several people have asked me for a parts list, so here it is:
QtyItem
1F330 Frame
4Donkey ST2004-1550kv Brushless Motor
4Turnigy Plush 9g 10A ESC
1MultiWii MicroWii ATmega32U4 Flight Controller
1OrangeRX R100 DSM2 Satellite Receiver
1XT60 Male power connector
4Props: 7045, 7060, or 8038 (2 CW & 2 CCW)
43mm prop adapter
1ZIPPY Compact 2200mAh 3S 25C Lipo

A few build notes:

  • Use 4-inch zip-ties to attach the motors (described above)
  • You can use an XT60 to 3.5mm bullets power distribution cable instead, especially if you choose 10/12A ESCs that have 3.5mm bullets.  I built one this way, and one with directly soldered leads.
  • You'll have to bind the R100 to your transmitter with a separate receiver (or by flashing special Spektrum Satellite Bind Code to the FC first.)
  • This quad can actually carry a 2600mAh battery for 10+ minutes of flight time!
  • Add a lipo alarm to warn you when the battery is low.
I have two built right now.

One with 7060 phosphorescent props, UV LED strips on the arms, and a 4W spotlight:


The other with 8038 props, a GoPro Hero 2, Minim OSD board, and video transmitter on it:


Saturday, March 8, 2014

Ducky EDF Quad - Motor Mounts and Second Test

I had the EDFs mounted to the frame with zip ties for the first test.  That proved a bit unstable.  I also had the problem of the motor housings sticking down lower than the rest of the quad, which posted a threat to them on landing.

Talon motor mount
So, I decided to kill two birds with one stone by making some EDF mount brackets that extended vertically below the bottom of the motor housings.  The Turnigy Talon frame I used included these aluminum "T" mounts, intended to be mounted horizontally at the end of the tubular arms to allow you to mount the motor on top.  I simply turned them 90 degrees so that the flat face was vertical to align them with one of the two flanges protruding from the side of the EDF housings.

To mount the EDF flanges to them, I fabricated a mounting bracket to use as a clamp.  I used an old license plate frame that I cut into four equal length parts and drilled matching holes in:

Four mounts cut from a discarded license plate frame

Drilled and mounted to EDF with motor bracket

Mounted to quadcopter frame

I filmed a new test flight with the modifications.  I wasn't really thinking about the fact that I was filming during the flight, or I would have put more effort into keeping it closer to me.  Overall, it flies really well.  It has a slight left yawing tendency, but I suspect that is because I haven't really done anything to precision align the EDFs.  (I just eyeballed them and clamped them down.) 

I avoided using 100% power to see how it did on flight time.  With the flying you see it used about 70% of the battery life in just over 5 minutes.  So, not bad!


Wednesday, March 5, 2014

Attacking Conjecture : "Ducky" the EDF Quad

I decided, against conventional "wisdom", to construct a quadcopter that uses Electric Ducted Fans (EDFs) for thrust.  There is conjecture all over the internet as to why this is a bad idea, but I was having a hard time finding any real science or performance data to back it up.  So, why not build one and see what happens?

What are EDFs?

EDFs are basically small, higher pitch, higher rpm propellers (sometimes called "impellers" in this application, to differentiate them from conventional propeller design) inside a cylindrical duct with a tapered inlet and as little clearance between the blades and the duct wall as possible.  They look more like jet engines than conventional propellers.  Tangent: Modern jet engines actually are turbine driven ducted fans, called "turbofans."

The primary benefit of a ducted fan is increased efficiency of the propeller by preventing (or reducing) the phenomenon of "tip vorticies" and allowing a greater range of operating speed without "propeller stall."  There are also some secondary benefits related to the air being forced through the duct.  (E.g. more output consistency in turbulence than an "open propeller" since the propeller is effectively shielded and moving faster.)

They spin at tens of thousands of RPM (as opposed to merely a few thousand RPM like conventional R/C props), but being completely contained means they pose less of a hazard to people or objects that the aircraft might collide with and take up less horizontal space along the plane of the propeller.

At any rate, if you tell the R/C community that you want to use an EDF for a multirotor application, you immediately get a few reasons why "it won't work" or "it's not a good idea."  I'll dissect those here:

R/C Community Myth Number 1:  "You can't use EDFs for static thrust applications."


Variations: 
  • "EDFs are less efficient at static thrust than open props." 
  • "EDFs don't produce full power until they get a bite on the air moving through the duct."

(That last one is my favorite, because it's a visual description of complete and utter nonsense.)

The conjecture is that EDFs really only shine when moving through the air at high speed.  What's odd about this conjecture is that the full-scale aerodynamics and aviation community says exactly the opposite about ducted fans:

  "... the ducted fan is more efficient in producing thrust than a conventional propeller, especially at low speed and high static thrust level." [http://en.wikipedia.org/wiki/Ducted_fan#Advantages]

 "When compared to an isolated propeller of the same diameter and power loading, ducted propellers typically produce greater static thrust."  [Abrego & Bulaga, "Performance Study of a Ducted Fan System", NASA Ames, 2002]

This would seemingly make them more ideal for multirotors than open props, as multirotors spend most of their energy on vertical lift (which is mostly static.)


R/C Community Myth Number 2:  "EDFs don't change speed fast enough for multirotor stability."


Variations:
  • EDFs have too much rotational inertia for the fine-power adjustments that the flight controller will need to make.
  • EDFs take too long to "spool up" (or down) to use for multirotors.

This one actually had me concerned.  Since EDF rotors spin at up to 10x the speed of conventional open props, it stands to reason that the inertia might be an issue.  Certainly, in the typical application of R/C EDFs - scale model jet fighters - it doesn't matter how fast the motor reaches a particular RPM or how much control "resolution" you have once it gets there.  So the performance characteristics in that regard are just largely unknown.

But that's just it.  They're unknown.  I could find absolutely no performance data about the power resolution or latency of R/C scale EDF systems.  It seems no one has measured it, yet many people are willing to state as canon that it's not good enough for this application.  The very definition of conjecture.

I decide the only way to find out is to buy some and try it.  After all, we're doing this for fun, right?  And what's more fun than potentially launching a completely uncontrollable aircraft with a massive LiPo battery on board?

R/C Community Myth Number 3:  "Without the adverse torque from the open propeller, you won't have any yaw ability."


I only saw this mentioned a couple of times, but Newtonian physics pretty much just disavows this one.  The opposing torque of each motor is proportional to the thrust it's producing.  I'm pretty confident there's enough torque there to yaw effectively.

Anyway... enough speculation.   I have plenty of reason to believe that this will work, in spite of the various opinions I've seen posted online that it won't.


First order of business:  Counter Rotating EDFs

I like the simplicity of quadcopters, but to build that I need counter rotating EDF rotors.  This turned out to be tricky, but I actually found a few.  I narrowed the ones I could find down to two likely candidates:
Both offered almost exactly the same amount of thrust at full power (4 pounds each!), but the Freewing ones are lighter and purport to draw slightly less power, so I decided to start with those.  Note: Both of the above are available from multiple vendors, so if you're shopping for them you might do a Google search on the names for comparison. 

So now that I know the size, weight, and power requirements of the EDFs I'm using, I put together the following parts list for the rest of the aircraft:

Testing the EDF / ESC combination

Once I got the EDFs, I tested one by connecting it directly to the "Throttle" output of the RX and hooking up the Multistar 45A ESC and battery.  I tethered the EDF to a block of wood and ran it at various power outputs on my back patio.  Observations:
  • Holy %#& this thing is loud!  It sounds like a vacuum cleaner from hell.
  • It produces a LOT of thrust, just as advertised.
  • It changes speed between 25% -> 50% -> 100% and back as quickly as I can move the throttle lever.  There is no noticeable "lag time".
I decide to proceed with the build!


Mounting the EDFs to the Talon frame


I found that rotating the Talon's included "T mounts" 90 degrees made a good vertical mounting post for the EDFs.  Initially I mounted them simply by wrapping long PVC zip ties around the EDF body and through the mounting holes of the T mount.  

There were two problems to this approach:
  • It eliminated the possibility of mounting the Talon's included "landing gear", as it went on the bottom of the (now rotated 90 degrees) T mount.
  • While it seems fairly stable on the Z axis, it allows the EDF to rotate a bit which will cause alignment issues (and possible yaw control issues) in flight.

Still, I deemed it good enough for testing, so with that decided on I went ahead and mounted the rest of the wiring and electronics:

Ducky, fully assembled!

Test Flights

I did two tests prior to the filmed flight test you see below.
  • Tethered test:  I tethered the quad to the ground using some long bungee cords and some heavy weights so that it couldn't fly away.  In this configuration, I did some run-up tests, hovered it (within the length of the 36" tethers) and saw that it actually flies and seems to be controllable.
  • Hover test:  Gingerly, I removed the tethers and basically did the same flight.. I flew it up to about 3 feet AGL and tested that I have control of it before bringing it back down and shutting it down.
After these two successes, I decided to do the first "free flight" test.  In this test I'm running on only one of the two 35C Lipo batteries.  Note:  This reduces the weight but probably also means I don't quite have full power available, as the battery is not quite capable of delivering the full 160 - 180 amps of current that the combination of the four motors could possibly draw.


IT FLIES!!!!!

It actually flies pretty damned well, given that I haven't made any changes to the default MultiWii 2.3 PID settings.  That high speed climb was a little crazy, given that I knew I was at the output limit of the single battery... but I couldn't help it.

That's all for now, but I promise there's more to come...

Tuesday, February 25, 2014

MultiWii board differences

A common question I get is:  "What MultiWii flight controller should I use?"

There are a few determining factors involved in this decision.  The primary considerations are:
  1. What microcontroller (µC) do you need
  2. What integrated sensors do you want?

What Microcontroller (µC) should you look for?

MultiWii is based on the Atmel corporation's 8 bit "megaAVR" series of ÂµCs.  All the MultiWii boards I've seen are based on one of three ÂµCs, but you could certainly port the software to others if you're good at microcontroller integration.

Below is a table of the three most common and their relevant specifications:

µC flash ram eeprom serial uarts usb ports
ATmega328p 32 kilobytes 2048 bytes 1024 bytes
1
0
ATmega32u4 32 kilobytes 2560 bytes 1024 bytes
1
1
ATmega2560 256 kilobytes 8192 bytes 4096 bytes
4
1

Those of you who are familiar with AVR µCs will notice I left off the number of digital, analog, and PWM pins.  The truth is that all three have enough for basic Multiwii applications, and how many of each are exposed to you is dependent on the individual board manufacturer, so it doesn't seem relevant to list those here.  If you want to do some really custom AVR stuff that might use the expanse of all the pins available, you'll need to research flight controller boards carefully (or better, fabricate your own!)

So, why are the specs that I listed relevant?


Flash:

The flash memory is the program storage.  This is where you store the actual Multiwii software (plus the Arduino bootloader, if you want to program it via the Serial/USB interface.)

MultiWii with basic functions enabled compiles to about 24k.  Start adding additional functions like barometric altmeter, buzzer, or FAILSAFE and it starts to push 28k.   Add in GPS and it suddenly gets right to 32k, or possibly more.

This is important to note:  With all the functions enabled (GPS, Buzzer, FAILSAFE, BARO, &etc.) MultiWii will not fit on a 32k-flash storage µC along side a bootloader.   You can "sort of" get it all in there if you forego the bootloader and program it via the ICSP header, but even then you will be space constrained.  (My last build of MultiWii 2.3 that I put on an Atmega32u4 was 31.9k!)   This limitation is what pushed me from the Atmega32u4 to the ATmega2560.  I started writing custom code and ran out of space!!

Ram:

Not generally a problem for MultiWii, but if you're into development / tinkering with the actual code then be careful if you're using the 328p.  If you run out of RAM, the flight controller will malfunction in ways that will make the multicopter fly completely out of control or do unexpected (possibly dangerous) things.  This happens because overallocation of RAM will cause values in memory to become corrupted, which is a Very Bad Thing(tm) when you're running a tight PID loop to maintain aircraft stability.  ;)

Eeprom:

Again, not generally a problem for MultiWii in its default state, as it normally only stores a small amount of configuration data in eeprom.  But if you want to log data to non-volitile memory for later diagnosis then more is better.


Serial Uarts:  (Actually called USARTs on AVRs)

This one is often overlooked.  This is the number of serial I/O lines you can have on this ÂµC.  MultiWii uses serial I/O for the following functions:
a) MultiWii GUI / Configuration
b) Telemetry data for OSD / HUD
c) GPS
d) Spektrum Satellite or OrangeRX / LemonRX Satellite receiver data
e) Re-flashing the software (via Arduino bootloader)

a) & e) are used on the ground when you're configuring / testing things.  As such, this port can be shared with functions b, c, or e.  You don't really want to share it with d though, as that will prevent you testing / diagnosing issues with your TX/RX configuration.

b) is nice if you're doing any sort of First Person View (FPV) flying.

c) is optional, but a nice capability.  There is support for doing GPS over the i2c bus instead, but it's more limited in capability (as of 2.3)

d) I really like the super-tiny "satellite" style DSM2 receivers, and the fact that they communicate over the serial bus... but it requires a dedicated serial port that you don't share with anything else for reliability.  If you use a "traditional" R/C receiver (one output per axis) then this won't apply.

So as you can see, depending on the capabilities & combination of features, you can easily outgrow the 328p or 32u4 ÂµCs single serial port capability.

USB ports:


This is really an extension of functions a and e above (Serial Uarts).  Having onboard USB simply saves you from using a USB -> FTDI adapter to perform those functions.

What Sensors do you want?

All Multiwii multirotor flight controllers include at least one sensor (gyro) on the integrated i2c bus.  Most include additional sensors.  Below is a breakdown of the sensor types and their functions.  I won't bother trying to list the individual sensor part numbers because they vary wildly.  You can look those up on your own.  ;)

gyro  - The most basic sensor needed to make multirotor stability possible.  All FCs should have one of these.

accelerometer - Often integrated into the same chip as the gyro.  Required for "auto level" modes: angle, horizon.  Also required for FAILSAFE and autonomous flight.

magnetometer - Provides magnetic compass heading.  Recommended for GPS autonomous flight.  required for "heading hold", "headfree" flight modes

barometer / barometric altimeter - required for Altitude Hold.  Recommended for GPS autonomous flight.

Flight controllers with all of the above are common.  Many also expose the I2C bus pins so you can add your own.  Be careful if you tinker with the I2C bus.  If you cause bus delays or errors that interfere with the accelerometer it will make your aircraft unstable in flight.  ;) 

GPS - pretty self explanatory, this is required for "position hold", "return to home", and the (currently experimental) waypoint navigation being developed.  The GPS units that are supported come in a few flavors.  The most basic support is a NMEA serial output GPS connected to one of the serial input lines.  Adding uBlox or MTK protocol support can lighten some of the load from the flight controller.  Look in the Multiwii config.h and GPS threads on Multiwii.com's forum for more information.

Note: Multiwii supports GPS over the i2c bus, but it's not being maintained and doesn't support the new experimental autonomous "waypoint navigation" that's being worked on by EOSBandi, so if I were building / buying a new MultiWii system I wouldn't depend on i2c GPS.


Read more about the Multiwii Flight Modes mentioned above here:
http://www.multiwii.com/wiki/index.php?title=Flightmodes  (Sadly outdated but mostly still accurate.)


So, hopefully this will help you figure out which Multiwii-capable flight controller is right for your application!  At this point, I actively fly at least one multirotor with each ÂµC listed above.

Happy flying!

Turnigy Fiberglass Mini Quad: Sharky

Meet "Sharky", my first non-indoor quadcopter.   (Shown next to one of my brushed-motor nano quads for scale.)

I wanted to graduate to a larger quad, but not something huge, so I decided this 345mm span "mini" quad was the way to go.  I liked the size and design of this quad.

The "pseudo-airplane" shape on the frame looked more like a shark than an aircraft to me, hence the name.


We'll start with what I initially built:

I fly this with my existing OrangeRX T-Six DSM2 transmitter.
I run MultiWii 2.3 with some minor modifications on the 32U4 flight controller.

Side note:  I have made the following changes since the initial build:

  • Upgraded the flight controller to the MultiWii Pro (Atmega 2560 based)
  • Switched to 2-blade 8x4 props.  (Easier to balance.)
  • In the process of upgrading the motors to SunnySky motors - but that might require new ESCs.

As originally built, this is a pretty amazing and capable quad.  It's fast, responsive, and climbs like a bat out of hell.  It only took minor tuning to the original MultiWii PID settings to make it fly how I wanted.  With the 2200 mAh battery it can fly for 12 minutes in basic "normal" flight, or 6-7 minutes of "aggressive" / aerobatic flight.

There have been a few drawbacks to this design:

  1. The fiberglass frame is not very tolerant of crashes.  It breaks easily, particularly on the arms just inside from where the motors mount. 
  2. The fiberglass frame transmits vibration really well, so balancing the motors & props is important.  This is why I ended up switching to 2-blade props- they're much easier to balance than 3-blade ones.
  3. The Atmega 32U4 microcontroller has some hardware limitations that I eventually ran into with MultiWii.  More on that in a subsequent post.
  4. The Park300 motors damage easily.  I initially tried repairing them with new bearings / shafts, but had about a 25% success rate doing so.  A couple of motor failures caused catastrophic crashes.  This is why I'm switching to slightly larger motors.

Overall, though, this has been an amazing quad to learn on.  If you're building one:  Buy 2 frames, at least 3 complete sets of props (2 CW & 2 CCW), and 6 motors (2 spares.)  You'll be glad you did after your first crash, as you can get in the air again while you're waiting for replacements for your spares to come in the mail.  ;)

I strapped a really crappy "Redleaf" 720p camera (not recommended) on board and took this video the second time I took it out to fly it:


Later, I added a 200mw 5.8GHz video transmitter and a Gopro Hero2 camera...


... and tried my hand at some "First Person View" (FPV) aerobatics:


I decided that FPV flying is really fun, so I've been doing a lot more of that since.


More to come...

Wednesday, February 5, 2014

Tiny Unmanned Flying Things

Anyone who knows me well knows that lately I've been playing with remote-controlled flying things.   This post provides information and links to the small (nano) indoor flyable quadcopters I've been playing with.

I have built & modified a few quadcopters of various (small) sizes, from the tiny brushed-motor nano-quads like the HobbyKing Pocketquad & Syma X1 to a larger, more traditional brushless motor mini quad based on the Turnigy 345mm frame.  (More on that in a subsequent post.)

Throughout this endeavor I've been using (and customizing) the MultiWii flight control software, with various Arduino / Atmel-based flight control boards.  It's becoming a FAQ what hardware and systems I'm using, so in this post I'll detail my current setup.  Future posts will cover updates, new hardware, and a couple of crazy projects I'm working on.  ;)

Note: I buy a lot of parts made and sold by HobbyKing.com in China.  Their website is a bit... odd.. so I'll include the full name of each product in case the link to the product stops working as HK links tend to do.  Just search for the title of the item to find it if the links don't work.

Control Transmitter:

HobbyKing OrangeRX T-Six DSM2 Six Channel Transmitter (Mode 2)

Notes: I bought this transmitter because I wanted a DSM2 2.4GHz system, and it was cheap.  It's perfectly adequate, but I would eventually like 8 channels and the ability for the aux channels to have more than just "on-off" capability, so I might consider a Turnigy 9XR with custom firmware and the DSM2 TX module in the near future.

First nano quad: The HobbyKing Pocket Quad v1.1
HobbyKing Pocket Quad

Notes:  This is a pretty cool nano quad, but a note for the uninitiated:  It is not ready-to-fly.  It requires working knowledge of Arduino to get it set up, and some experience with Multiwii is helpful too.  It was a steep learning curve to get everything working on it.   For the firmware, I used rcgroups.com member Cesco's PQ customization of Multiwii which includes required changes for driving the mosfet / brushed-motor combination.

Once you get it working, though, it's a blast to fly, especially indoors.  It's agile enough to fly outdoors, but it's small enough that it's easy to lose your orientation and lose control of outside.  So be careful if you fly it outdoors.  I've now actually lost two of these things outside and not been able to find where they came down.  :-P

There's a long thread about the Pocket Quad (and its variants) at rcgroups.


Second nano quad: The Syma X1 MultiWii Conversion


Syma X1 with Micro MWC
After some more successes and failures with the PQ and some related hardware, I decided I was done with the "circuitboard as the frame" brushed motor quads.  They break too easily in a crash, which sort of negates the advantage of an otherwise resilient nano quad.

My current brushed-motor quad of choice is a modified Ready-To-Fly Syma X1 from Amazon.  Note, this thing comes ready to fly with an AWFUL cheap transmitter, and a flight controller that basically flies like a school bus drives.  It works, but it's not terribly exciting.

What I like about it, though, is the tiny carbon-fiber arms and the motor / gear / propeller combinations.  So, I bought it, gutted it, and replaced the flight control board with this really nifty Micro MWC flight control board from HobbyKing.  This FC is based on the Atmega328p, which I'm not a huge fan of, but it's plenty capable in this form factor as its worthwhile to sacrifice secondary UARTs and other such capabilities to get such a tiny and light package.  Seriously, the thing is the size of a postage stamp, includes the mosfets for the brushed motors, an integrated DSM2 receiver, and weighs < 2g.

The X1 is hilariously fun to fly with a MultiWii flight controller.  I can set the PID settings how I like, jack the rate up through the roof, and make the thing do crazy flips.  It becomes agile enough to fly outdoors on a windy day despite it's ridiculously light weight, and it's resilient enough to fly it into the ground without damage.

Note: Another similar option for this conversion is the WLToys V929

Important info about that HobbyKing Micro MWC flight controller, including instructions and custom firmware (again from Cesco, the king of "brushed motor" MultiWii modification) is in this long thread from rcgroups:  http://www.rcgroups.com/forums/showthread.php?t=1993117

More to come about my larger flying toys...

Sunday, January 19, 2014

modemspeed.py - See things at 300 baud again!

Sometimes, you just yearn to see things the way they looked online in 1985, you know?  Maybe you don't.  But in case you get into an argument with someone over whether that modem video you posted "looks more like 110 baud than 300 baud" you can whip out this little python script and pipe some unix commands through it to relive the glory days.  When men were men and online-p0rn was ASCII ART.


#!/usr/bin/python2.7

import sys
from time import sleep

def modem(text, speed):
  # Assume speed is in bits/sec, and we're running at 8,N,1
  # So, 10 bits per character.  (1 start, 8 char, 1 stop)
  delay = 1.0 / (speed / 10)  # = seconds per character
  for char in text:
    sys.stdout.write(char)
    sys.stdout.flush()
    sleep(delay)

if __name__ == "__main__":
  if len(sys.argv) > 1:
    baud = int(sys.argv[1])
  else:
    baud = 300
  for ln in sys.stdin:
    modem(ln, baud)